Tips: If you are using a canned frosting, empty the contents in a bowl and beat on medium-high to whip some air into your frosting. You will end up with more frosting to go around and less calories in every bite!
I have always loved, loved, loved my hidden can of store-bought chocolate frosting tucked into the back of my fridge, back in the corner behind the box of good-for-you yogurt and diet drinks, a place my boyfriend would never look!
Canned chocolate frosting has always been a guilty pleasure of mine. I can remember moving into my first apartment and enjoying the freedom of grabbing a spoon and digging deep into the luscious dark chocolate and pretending to myself I wasn't going to return to the fridge once again after my chocolate high wore off a few minutes later. Imagine my utter surprise when I opened up a highly anticipated can last week only to find it was terrible! The taste made me cringe and even worse, I did not have the ingredients to whip together any fresh frosting in its place so it had to do.
For the past 6 months my entire dessert repertoire has included fresh, made from scratch, delicously, warm your heart, desserts not including the desserts and foods I made in France off and on for the past year before that started the whole baked-from-scratch frenzy. I have always enjoyed baking up cookies, throwing together cakes and stirring up melted marshmallows with a box of rice krispies for the perfect afternoon treat and I longed for these items when I lived in France but with none of their too-few boxed cake mixes could I achieve the great boxed taste of America and forget frosting because that was non-existent in France. I did manage to stow away some cans of frosting because who was I kidding, I couldn't make frosting to save my life!
Upon arriving back in the US, with too much time on my hands and a craving to do something "interesting," I immersed myself in baking cupcakes and throwing together MY perfect frosting which I have yet to actually make perfect but it is delicious nonetheless. In the past, cake was cake, frosting was frosting and it all tasted good but I guess after a while of tasting time after time fresh goods, it is hard to go back to the past because you realize nothing can ever come close to that fresh baked taste.
I whipped up a box mix of Funfetti Cake because as the name implies, it looked like "fun." The cake wasn't bad but it wasn't great either. It was too light to be a cake, it had no real flavor, there was nothing that slapped me in the face and made me go "Ahh, this is the life! This is really yummy!" The same with the canned Chocolate Frosting. It suddenly had an overly sweet taste and an odd texture that I had never noticed before. Maybe the cake could have been saved with a dash of vanilla and one of The Cake Mix Doctor's books as a guide to navigating the boxed world with a little extra finesse but alas I was highly disappointed with my venture back into the commercial grocery store baking world and am afraid I may not return again.
Lesson learned: it is a thin line when you venture over into the baking side. You may think you are coming out ahead with all of your baked, fresh goods but you will never be able to go back and enjoy the perfect simplicity of whipping up a boxed mix again.
I have been in the process of moving for the past couple of weeks so baking has been a bit obsolete. Hopefully things will calm down for a moment at Thanksgiving and I can whip up some great things for the upcoming holiday season!
Friday, November 19, 2010
Tuesday, November 2, 2010
S'mores Cupcakes with Toasted Marshmallow Frosting
I found the most gorgeous looking S'more cupcakes on Annie's Eats Blog and had to make it mostly for my love of all things Marshmallow and Chocolate and well...S'mores in general. I swapped out her posted chocolate cake recipe for a Chocolate Cupcake recipe I have used a few times from JoyofBaking.com.
We are getting ready to move again so things are beginning to become quite hectic with less time to bake and even less time to post photos with packing and last minute travels whatnot so these photos are a bit late.
Yield: 24 cupcakes
Ingredients:
For the graham cracker crust:
Chocolate Cupcakes:
 Place 12 whole sheets of graham crackers in a plastic bag
 Continue to pulverize graham crackers until a nice crumbly consistency!
 I found chopping chocolate squares not quite so easy, so please tell me your methods! Eventually I began scrapping the knife down the short side of the chocolate and it worked fairly well.

 Using the bottom of a tall shot glass, I pressed the graham cracker then sprinkled the chocolate in each cup.


 I wanted to add marshmallows to the inside so I created two small holes then pressed mini marshmallows in while the cupcakes were still hot so they would be melt-y.
 The EZ Egg Cracker (an as seen on TV gimmicky looking gadget) is awesome! I cracked and separated all the eggs in record time! Separate eggs while still cold for easiest separating then let egg whites warm to room temperature.


 It may take some time but if you keep mixing...
 and mixing...
 You will have the most gorgeously glossy AND tasty marshmallow frosting! Yum!!

 I did not have a kitchen torch and as we are moving out of the country soon and kitchen torches are airplane friendly I opted to brown in the oven. BE VERY CAREFUL here if you try this! As you can see, the cupcake on the far left caught on fire as it was too close to the top. Not a very safe idea unless you pay very close attention to the cupcakes.
 These were soo good. The toasted marshmallow topping was delicious and looked so nice.


We are getting ready to move again so things are beginning to become quite hectic with less time to bake and even less time to post photos with packing and last minute travels whatnot so these photos are a bit late.
Yield: 24 cupcakes
Ingredients:
For the graham cracker crust:
- 1½ cups graham cracker crumbs
- ¼ cup sugar
- 5 1/3 tbsp. unsalted butter, melted
- 8 oz. bittersweet chocolate, finely chopped (I used only 3 ounces and next time probably would not use any as I did not notice this extra step)
Chocolate Cupcakes:
- 1/2 cup (50 grams) Dutch-processed cocoa powder
- 1 cup (240 ml) boiling hot water
- 1 1/3 cups (175 grams) all purpose flour
- 2 teaspoons baking powder
- 1/2 teaspoon salt
- 1/2 cup (113 grams) unsalted butter, room temperature
- 1 cup (200 grams) granulated white sugar
- 2 large eggs
- 2 teaspoons pure vanilla extract
- 8 large egg whites, at room temperature
- 2 cups sugar
- ½ tsp. cream of tartar
- 2 tsp. vanilla extract
Crust:
Preheat the oven to 350° F. Line two cupcake pans with paper liners. In a small mixing bowl, combine the graham cracker crumbs, sugar and melted butter; mix well with a fork. (I used my hands to get even consistency throughout) Drop about 1 tablespoon of the graham cracker mixture in the bottom of each cupcake liner and press down to line the bottom. Sprinkle a small amount of the chopped chocolate on top of the graham cracker crusts. Bake for 5 minutes. Remove from the oven and maintain the oven temperature.
Marshmallow Frosting:
Combine the egg whites, sugar and cream of tartar in the top of a double boiler. Heat the mixture, whisking frequently, until it reaches 160° F with an instant-read thermometer. (I do not own a thermometer so I whisk until the sugar has completely dissolved) Transfer the mixture to the bowl of an electric mixer fitted with the whisk attachment. Whisk starting at low speed and gradually increasing to medium-high speed until stiff, glossy peaks form. Mix in the vanilla until combined. Frost cooled cupcakes as desired. Brown with a kitchen torch and garnish with chocolate and graham cracker segments (optional).
 Place 12 whole sheets of graham crackers in a plastic bag
 Continue to pulverize graham crackers until a nice crumbly consistency!
 I found chopping chocolate squares not quite so easy, so please tell me your methods! Eventually I began scrapping the knife down the short side of the chocolate and it worked fairly well.
 Using the bottom of a tall shot glass, I pressed the graham cracker then sprinkled the chocolate in each cup.
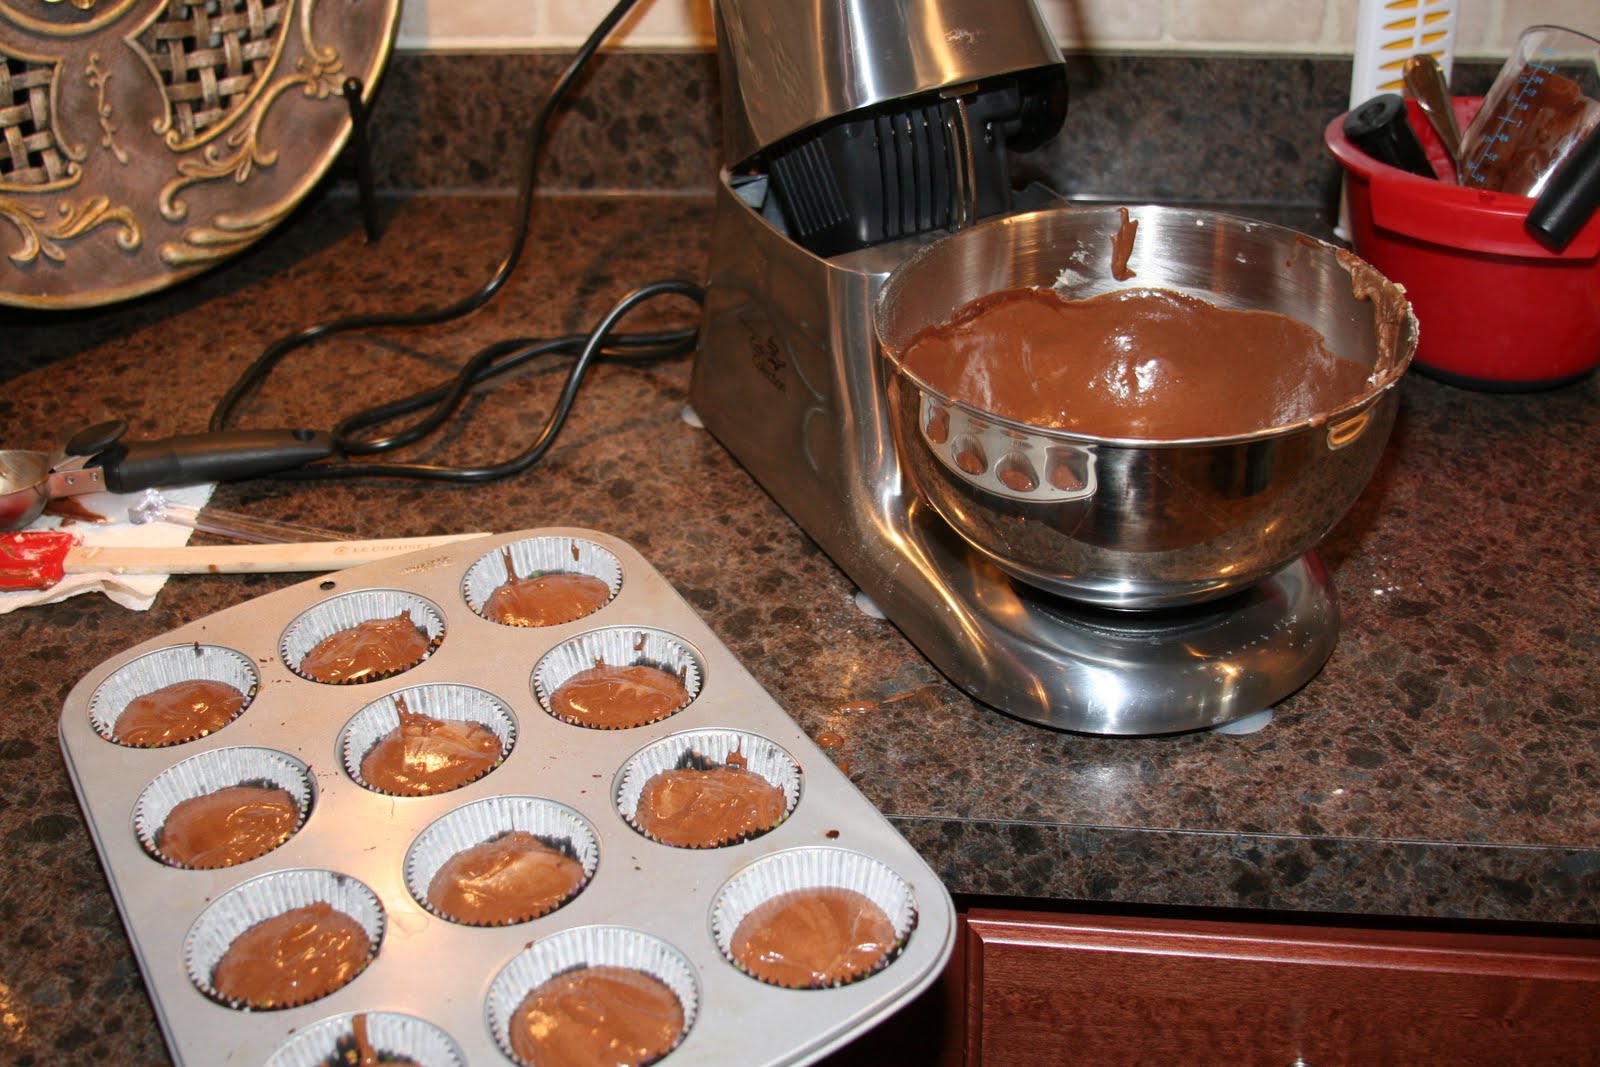
 I wanted to add marshmallows to the inside so I created two small holes then pressed mini marshmallows in while the cupcakes were still hot so they would be melt-y.
 The EZ Egg Cracker (an as seen on TV gimmicky looking gadget) is awesome! I cracked and separated all the eggs in record time! Separate eggs while still cold for easiest separating then let egg whites warm to room temperature.


 It may take some time but if you keep mixing...
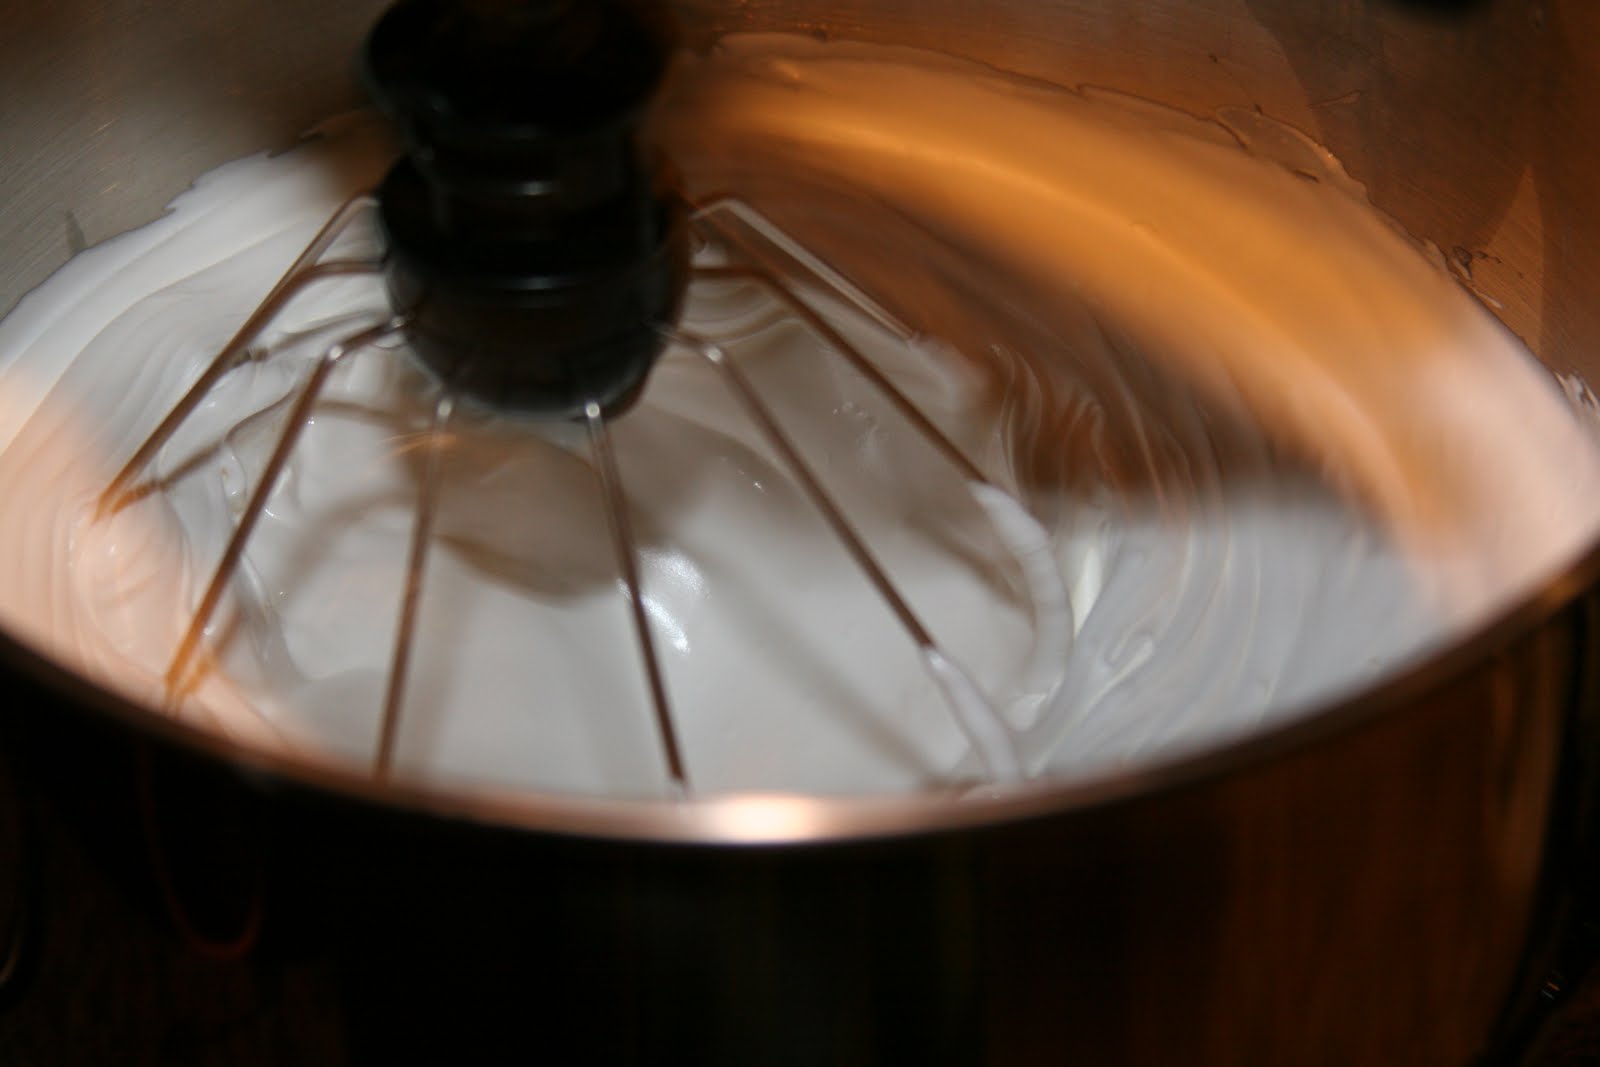 and mixing...
 You will have the most gorgeously glossy AND tasty marshmallow frosting! Yum!!
 I did not have a kitchen torch and as we are moving out of the country soon and kitchen torches are airplane friendly I opted to brown in the oven. BE VERY CAREFUL here if you try this! As you can see, the cupcake on the far left caught on fire as it was too close to the top. Not a very safe idea unless you pay very close attention to the cupcakes.
 These were soo good. The toasted marshmallow topping was delicious and looked so nice.

Monday, November 1, 2010
Homemade Gnocchi with Fresh Tomato Sauce
I absolutely love Gnocchi. For some reason its plump shape combined with its pasta-like texture make me salivate for a large Italian meal! A few years ago I had gnocchi for the first time at one of my favorite chain Italian restaurants, Maggiano's and fell in love. Now even though its a bit on the heavy side, it's my go-to "pasta" whenever we frequent Italian restaurants.
A few months ago, Soner and I went on a beef aging "adventure" trying to see what all the fuss was about aged beef and to see if it really is possible to age beef at home in your own fridge (it is!) and ever since then I have been looking for our next big assemble from scratch meal. Unfortunately, he was not as interested as I in making gnocchi so I embarked on this adventure alone. As it turns out, gnocchi is not nearly as difficult as I would have imagined and I plan on working on it and making it again in the near future maybe adding spices here and there to come up with the most flavorful options.
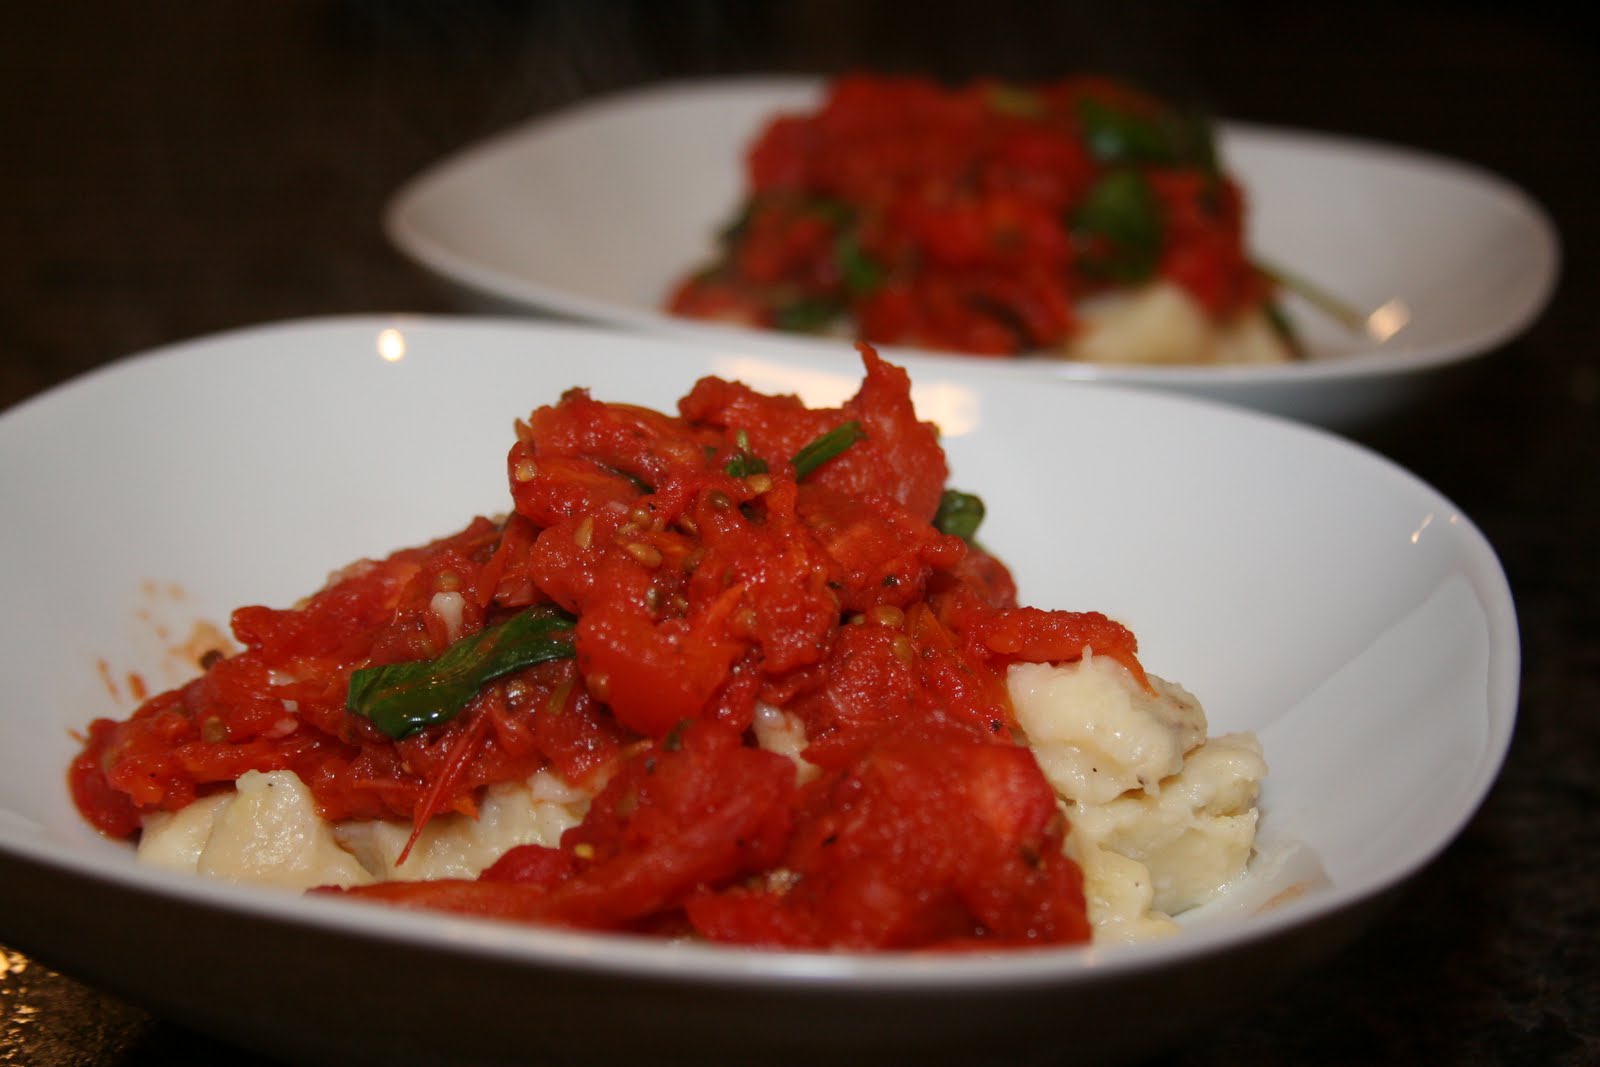
So here it is, gnocchi. Made with a fresh tomato sauce, this dish is sure to win everyone's hearts and stomachs.
How to Make Gnocchi
Ingredients:
- 4 large Russet Potatoes, fork pricked
- 1 large egg, beaten
- 2 tbl freshly grated Parmesan cheese
- 2 tbl unsalted butter, softened
- Sea Salt
- Pepper
- 1 cup plus 2 tbl all purpose flour, plus more for dusting
2. Add egg, cheese, butter, 1 tsp salt and pepper to taste; stir until combined.
3. Add flour and stir to make a rough dough, mix by hand until smooth. Add more flour if sticky.
4. Gather dough into a ball on floured surface, divide into 8 pieces. Roll each piece into 12" long, 1/2" thick logs with your hands.
5. Cut logs into 1" pieces.
6. Freeze on floured baking sheets until ready to cook.
OR
Bring a large pot of salted water to boil. Add gnocchi, stir and cook for 1 minute after they rise to the surface and float, about 3 minutes in total. Transfer with a slotted spoon and serve!
Bring a large pot of salted water to boil. Add gnocchi, stir and cook for 1 minute after they rise to the surface and float, about 3 minutes in total. Transfer with a slotted spoon and serve!


Aromatic Slow-Roasted Tomatoes
Ingredients:
1 tbl sugar
1 tbl extra virgin olive oil
1/2 tsp salt
1/2 tsp dried basil
1/2 tsp dried oregano
1/4 tsp freshly ground black pepper
4 pounds plum tomatoes, halved lengthwise
1. Preheat oven to 200 degrees F.
2. Combine all ingredients in large bowl, tossing gently to coat. Arrange tomatoes cut side up on coated baking sheet. Roast at 200 degrees for 7 hours.
3. You can either process in a food mill for a smoother texture or roughly mash with the bottom of a glass or such.


Tuesday, October 12, 2010
Ghostly Chocolate Cupcakes.. Mummies, Ghosts and Bones Oh MY!


- To make the ghosts, use a large round frosting tip. Hold tip close to cake and squeeze until desired size is achieved, release a bit and squeeze again creating another "level," release again a bit, squeeze and pull up to create point. Use gel or mini chocolate chips to create eyes.
- To create mummies, use the leaf tip and draw lines back and forth over the cupcake leaving room for the eyes. Use thin small candy discs for the eyes or colored icing. I used green gel with a dot of black gel but the green was not intense enough to show up really well.
- The "mound" of bones would have been really great if I had coated the frosting in oreo cookies to create a mound of bones in dirt but I was out of oreos! If you try this, be sure to link me to a picture. I would love to see how it comes out!
Chocolate Cupcakes (from Joyofbaking.com)
Ingredients:


Cheesecake-filled Pumpkin Cupcakes.. A fall favorite!

These are my favorite cupcakes thus far and I am not even a big fan of cheesecake! The melding of cupcake and cheesecake is perfect. The cupcakes came out super moist with a beautiful orange color and are super easy to make. I used the mixer only for the cheesecake and whisked the pumpkin cupcake with a hand whisk. This recipe does not require butter.
Try this recipe with Brown Sugar Meringue Frosting (here)!
Cheesecake-Filled Pumpkin Cupcakes
Ingredients:
- One 8-ounce package cream cheese, at room temperature
- 1/2 cup confectioners' sugar
- 2 large eggs, plus 1 large egg whites
- 1 1/2 teaspoons pure vanilla extract
- 1 1/2 cups flour
- 2 teaspoons pumpkin pie spice
- 1 1/2 teaspoons baking powder
- 3/4 teaspoons salt
- 1 cup canned pumpkin puree
- 1 cup granulated sugar
- 1/2 cup vegetable oil
Place a rack in the lower third of the oven and preheat to 350°. Line a 12-cup muffin pan with baking liners. Using an electric mixer, beat the cream cheese and confectioners' sugar for 3 minutes. Beat in 1 egg white and 1/2 teaspoon vanilla.
In a bowl, whisk the flour, pumpkin pie spice, baking powder and 1/2 teaspoon salt. In another bowl, mix the pumpkin puree, 2 eggs, granulated sugar, oil and 1 teaspoon vanilla. Whisk in the flour mixture.
Layer each muffin cup with some of the pumpkin batter, then the cream cheese mixture, then more of the batter. Bake until springy to the touch, 25 minutes. Let cool.
 Let cream cheese cool to room temperature (the fastest way to do this is slice into pieces)
 Mix cream cheese and 1/2 cup confectioners' sugar
 Beat in 1 egg and 1/2 tsp vanilla
 Whisk pumpkin puree, 2 eggs, 1 cup sugar, 1/2 cup oil and 1 tsp vanilla
 Whisk in flour mixture (2 tsp pumpkin pie spice, 1 1/2 tsp baking powder, 1/2 tsp salt, 1 1/2 cups flour)
 Fill cupcake liners with pumpkin batter 1/2 full then layer cream cheese then more pumpkin batter.
 Bake at 350 degrees for 25 minutes until springy.


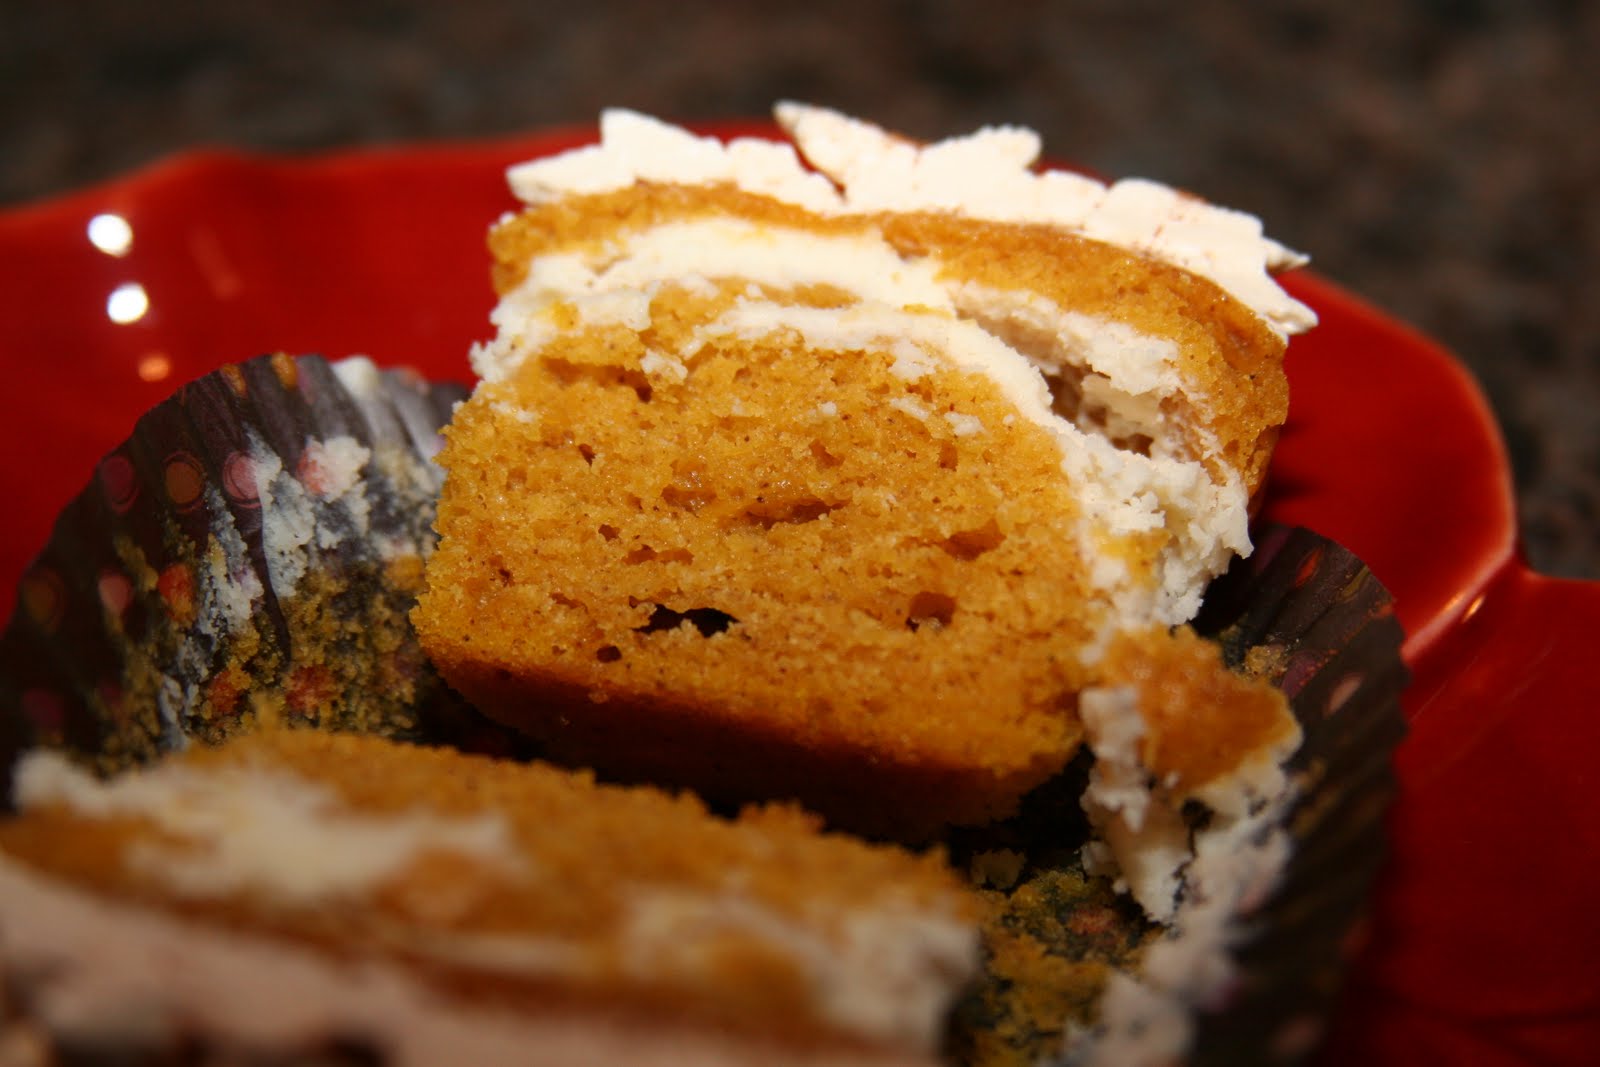
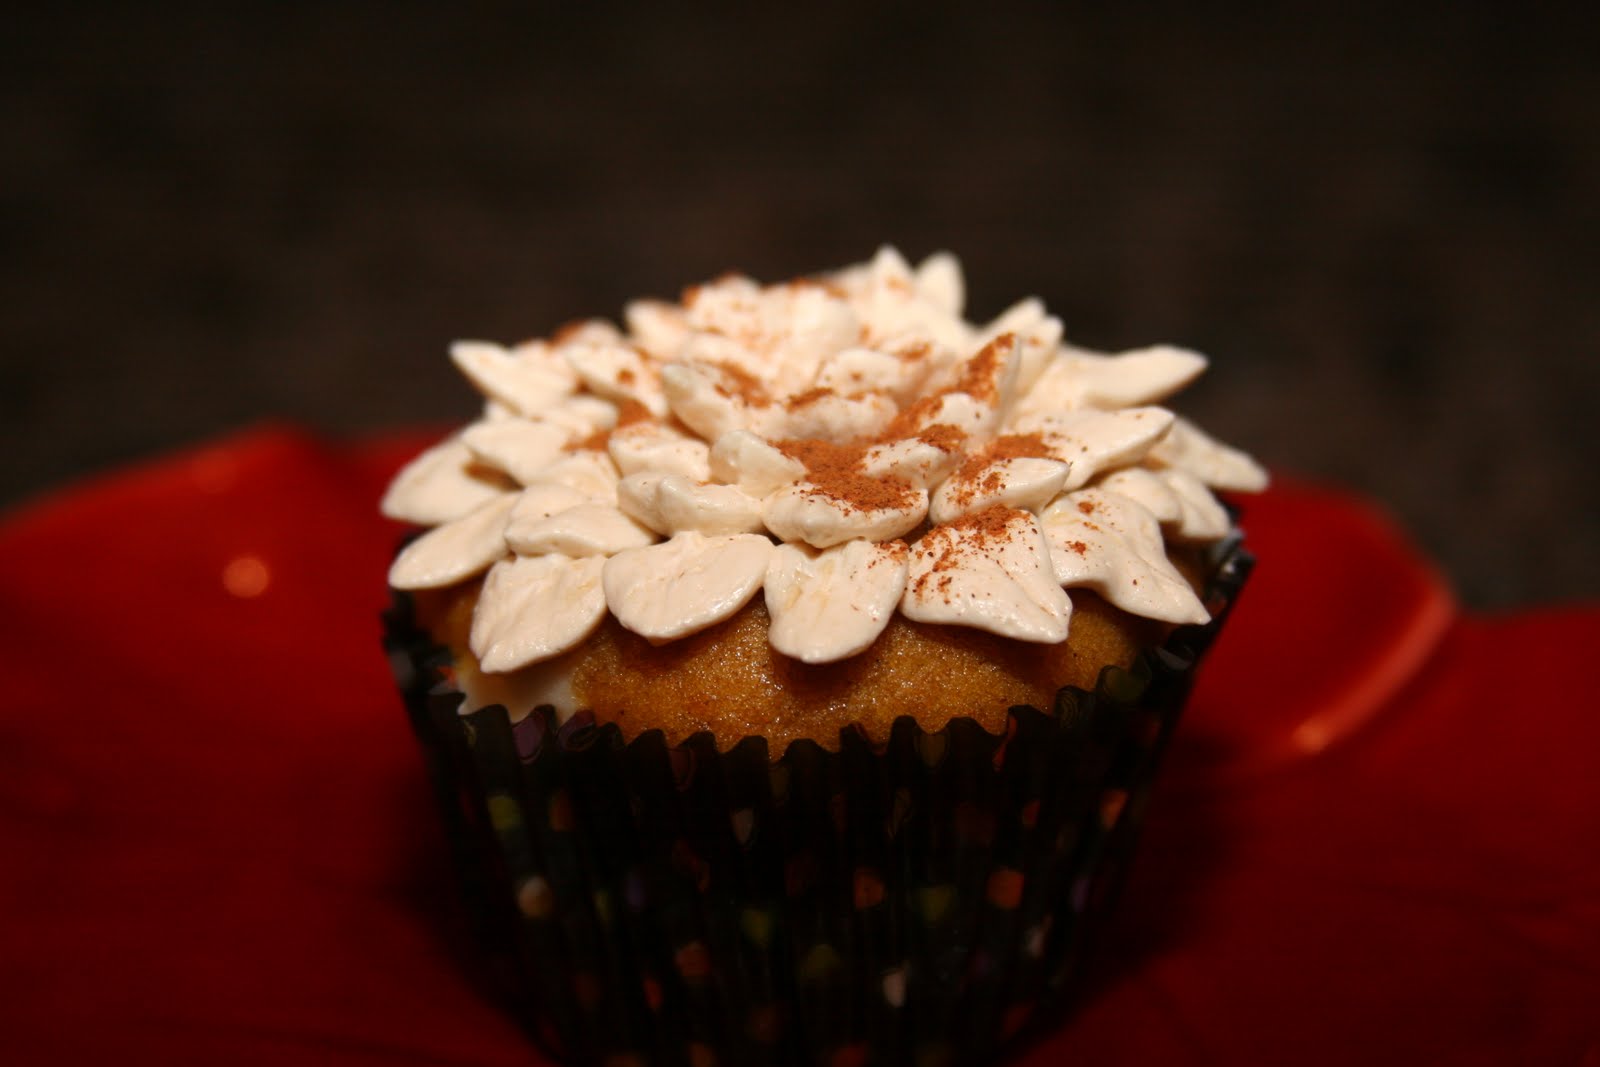 Frosted with Brown Sugar Meringue Frosting! It was delicious and the perfect compliment to the cupcakes! The Cheesecake-Filled Pumpkin Cupcakes are also wonderful without any frosting.
Side Note: I used the EZ Cracker Egg Cracker to break the eggs and to also separate the whites from the yolks. I thought this thing was a gimmick but it is awesome! It cracks open eggs perfectly!

Subscribe to:
Posts (Atom)